Installation
Windows
Note
If you prefer to work in a GNU/Linux environment directly on Windows, you can install WSL. You can then follow the instruction for Linux, WSL and macOS.
Make sure that you have Python 3.9 or 3.10.
Install Blender 3.3 using the official installer. You can install it to a custom directory, but from now on we will assume the default directory. Then run
"C:\Program Files\Blender Foundation\Blender 3.3\3.3\python\bin\python.exe" -m ensurepip
"C:\Program Files\Blender Foundation\Blender 3.3\3.3\python\bin\python.exe" -m pip install git+https://gitlab.discretization.de/python/pyddg@v0.0.1
Warning
This modifies your Blender installation. Updating or installing another Blender version may result in problems.
Create a directory for your project and enter it. Create and enter a virtual environment with
# create the virtual environment
python -m venv .\venv

# enter it
source venv\Scripts\activate

# install the library
pip install git+https://gitlab.discretization.de/python/pyddg@v0.0.1
Exit the virtual environment with
deactivate
Linux, WSL and macOS
Warning
Don’t install Blender using other methods unless you know what you are doing.
Install Blender 3.3 to a directory of your choice, e.g. ~/blender, with the following command:
# Install Blender 3.3.0 to ~/blender
sh <(curl https://gitlab.discretization.de/pyddg/pyddg/-/raw/develop/scripts/setup_blender) ~/blender 3 3 0
Warning
Blender is expected to crash if you attempt to run it now.
We don’t support newer versions of Blender right now, though they are likely to work.
Create a directory for your project and enter it. Create a virtual environment with
~/blender/blender-3.3.0/3.3/_python/bin/python3.10 -m venv venv
The following commands need to be run every time you want to work with the library:
export PATH="$HOME/blender/blender-3.3.0:$PATH"
export PYTHONPATH="venv/lib/python3.10/site-packages/"
source venv/bin/activate
Warning
Blender won’t work until you enter the virtual environment and set these environment variables.
Install the library with
pip install git+https://gitlab.discretization.de/python/pyddg@v0.0.1
Verify that Blender finds the library with
blender --background --python-expr 'import ddg; print("Successfully imported ddg!")'
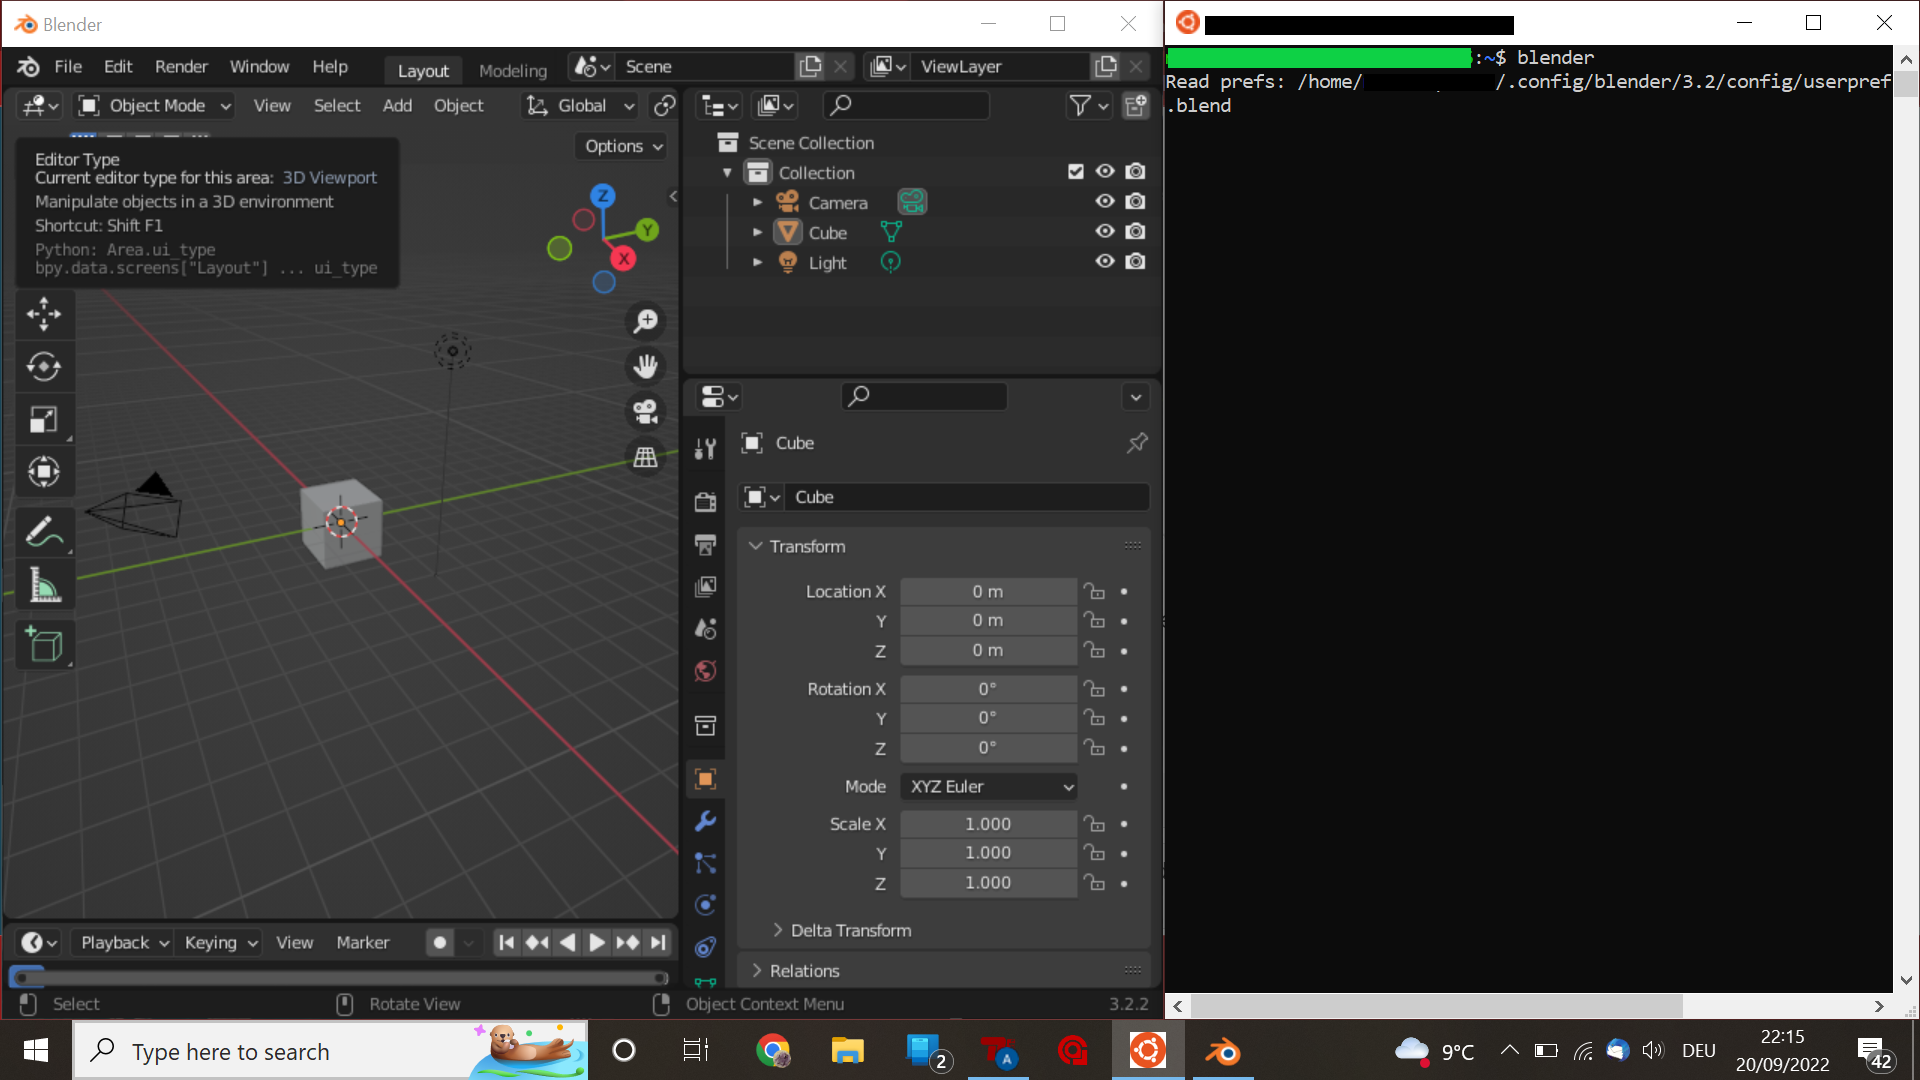
Start Blender with
blender
Deactivate the virtual environments with
deactivate
Setting up display for interactive Blender on WSL
While WSL supports Linux GUI apps on Windows 11, the same cannot be said for Windows 10.
In this case, you need to set up an X Server to display graphical outputs of interactive Blender.
VcXsrv is an open-source tool that can set up a Windows X Server. After installing VcXsrv, an X Server can be set up by running xlaunch.exe.
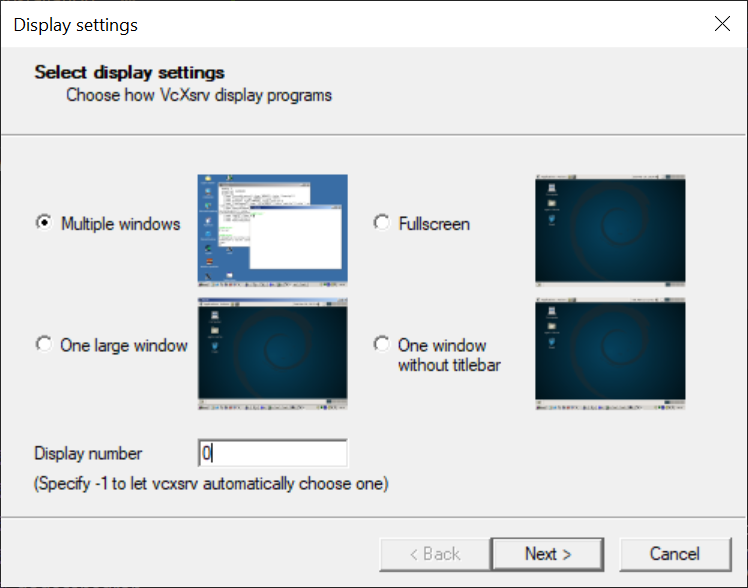
In Display settings, choose “Multiple windows”, Display number 0.
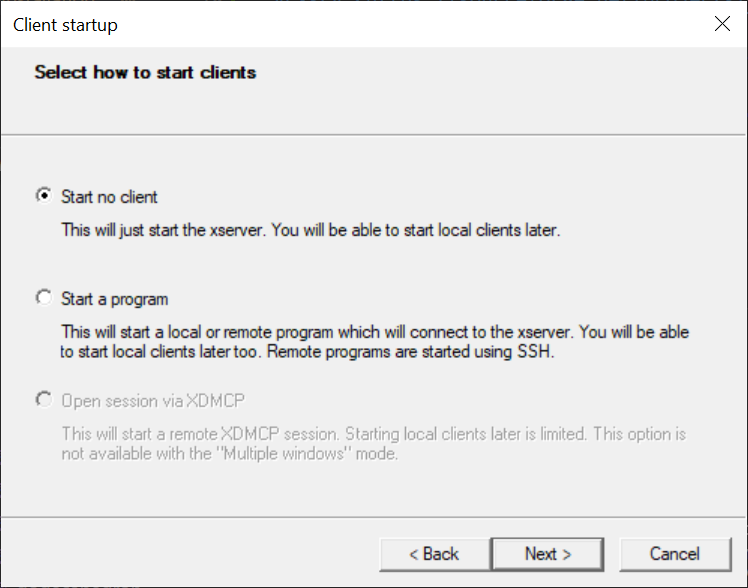
Choose “Start no client” for client startup option.
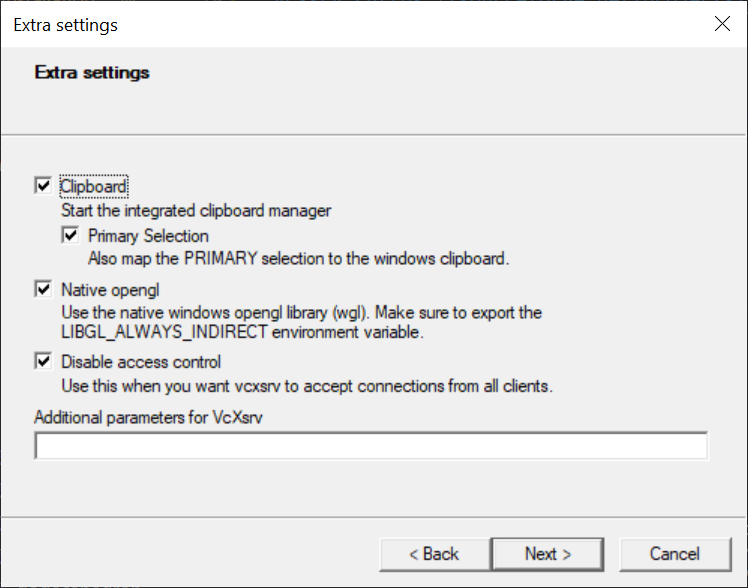
In Extra settings, tick “Disable access control” to enable access from clients in WSL.
Finally, do not forget to save the configuration and finish. Next time you need to start an X Server, start the saved .xlaunch file to avoid setting it up all over again.
You will know that VcXsrv is running when the XLaunch icon appears in the taskbar.

The next thing to do is to set the environment variable DISPLAY for our WSL instance. This can be done dynamically with:
export DISPLAY="`sed -n 's/nameserver //p' /etc/resolv.conf`:0"
If you already added Blender to the $PATH in WSL, simply running blender will launch interactive Blender.