Indexed Face Set
GeneralizedIndexedFaceSet
This Wiki shows how to generate an indexed face set and how to modify it, using the tools provided by pyddg. In this example will we do this by running python in a terminal.
At first we import the indexedfaceset module from pyddg:
>>> import ddg.datastructures.indexedfaceset.ifs as ifs
Now we’re ready to generate our first indexed face set.
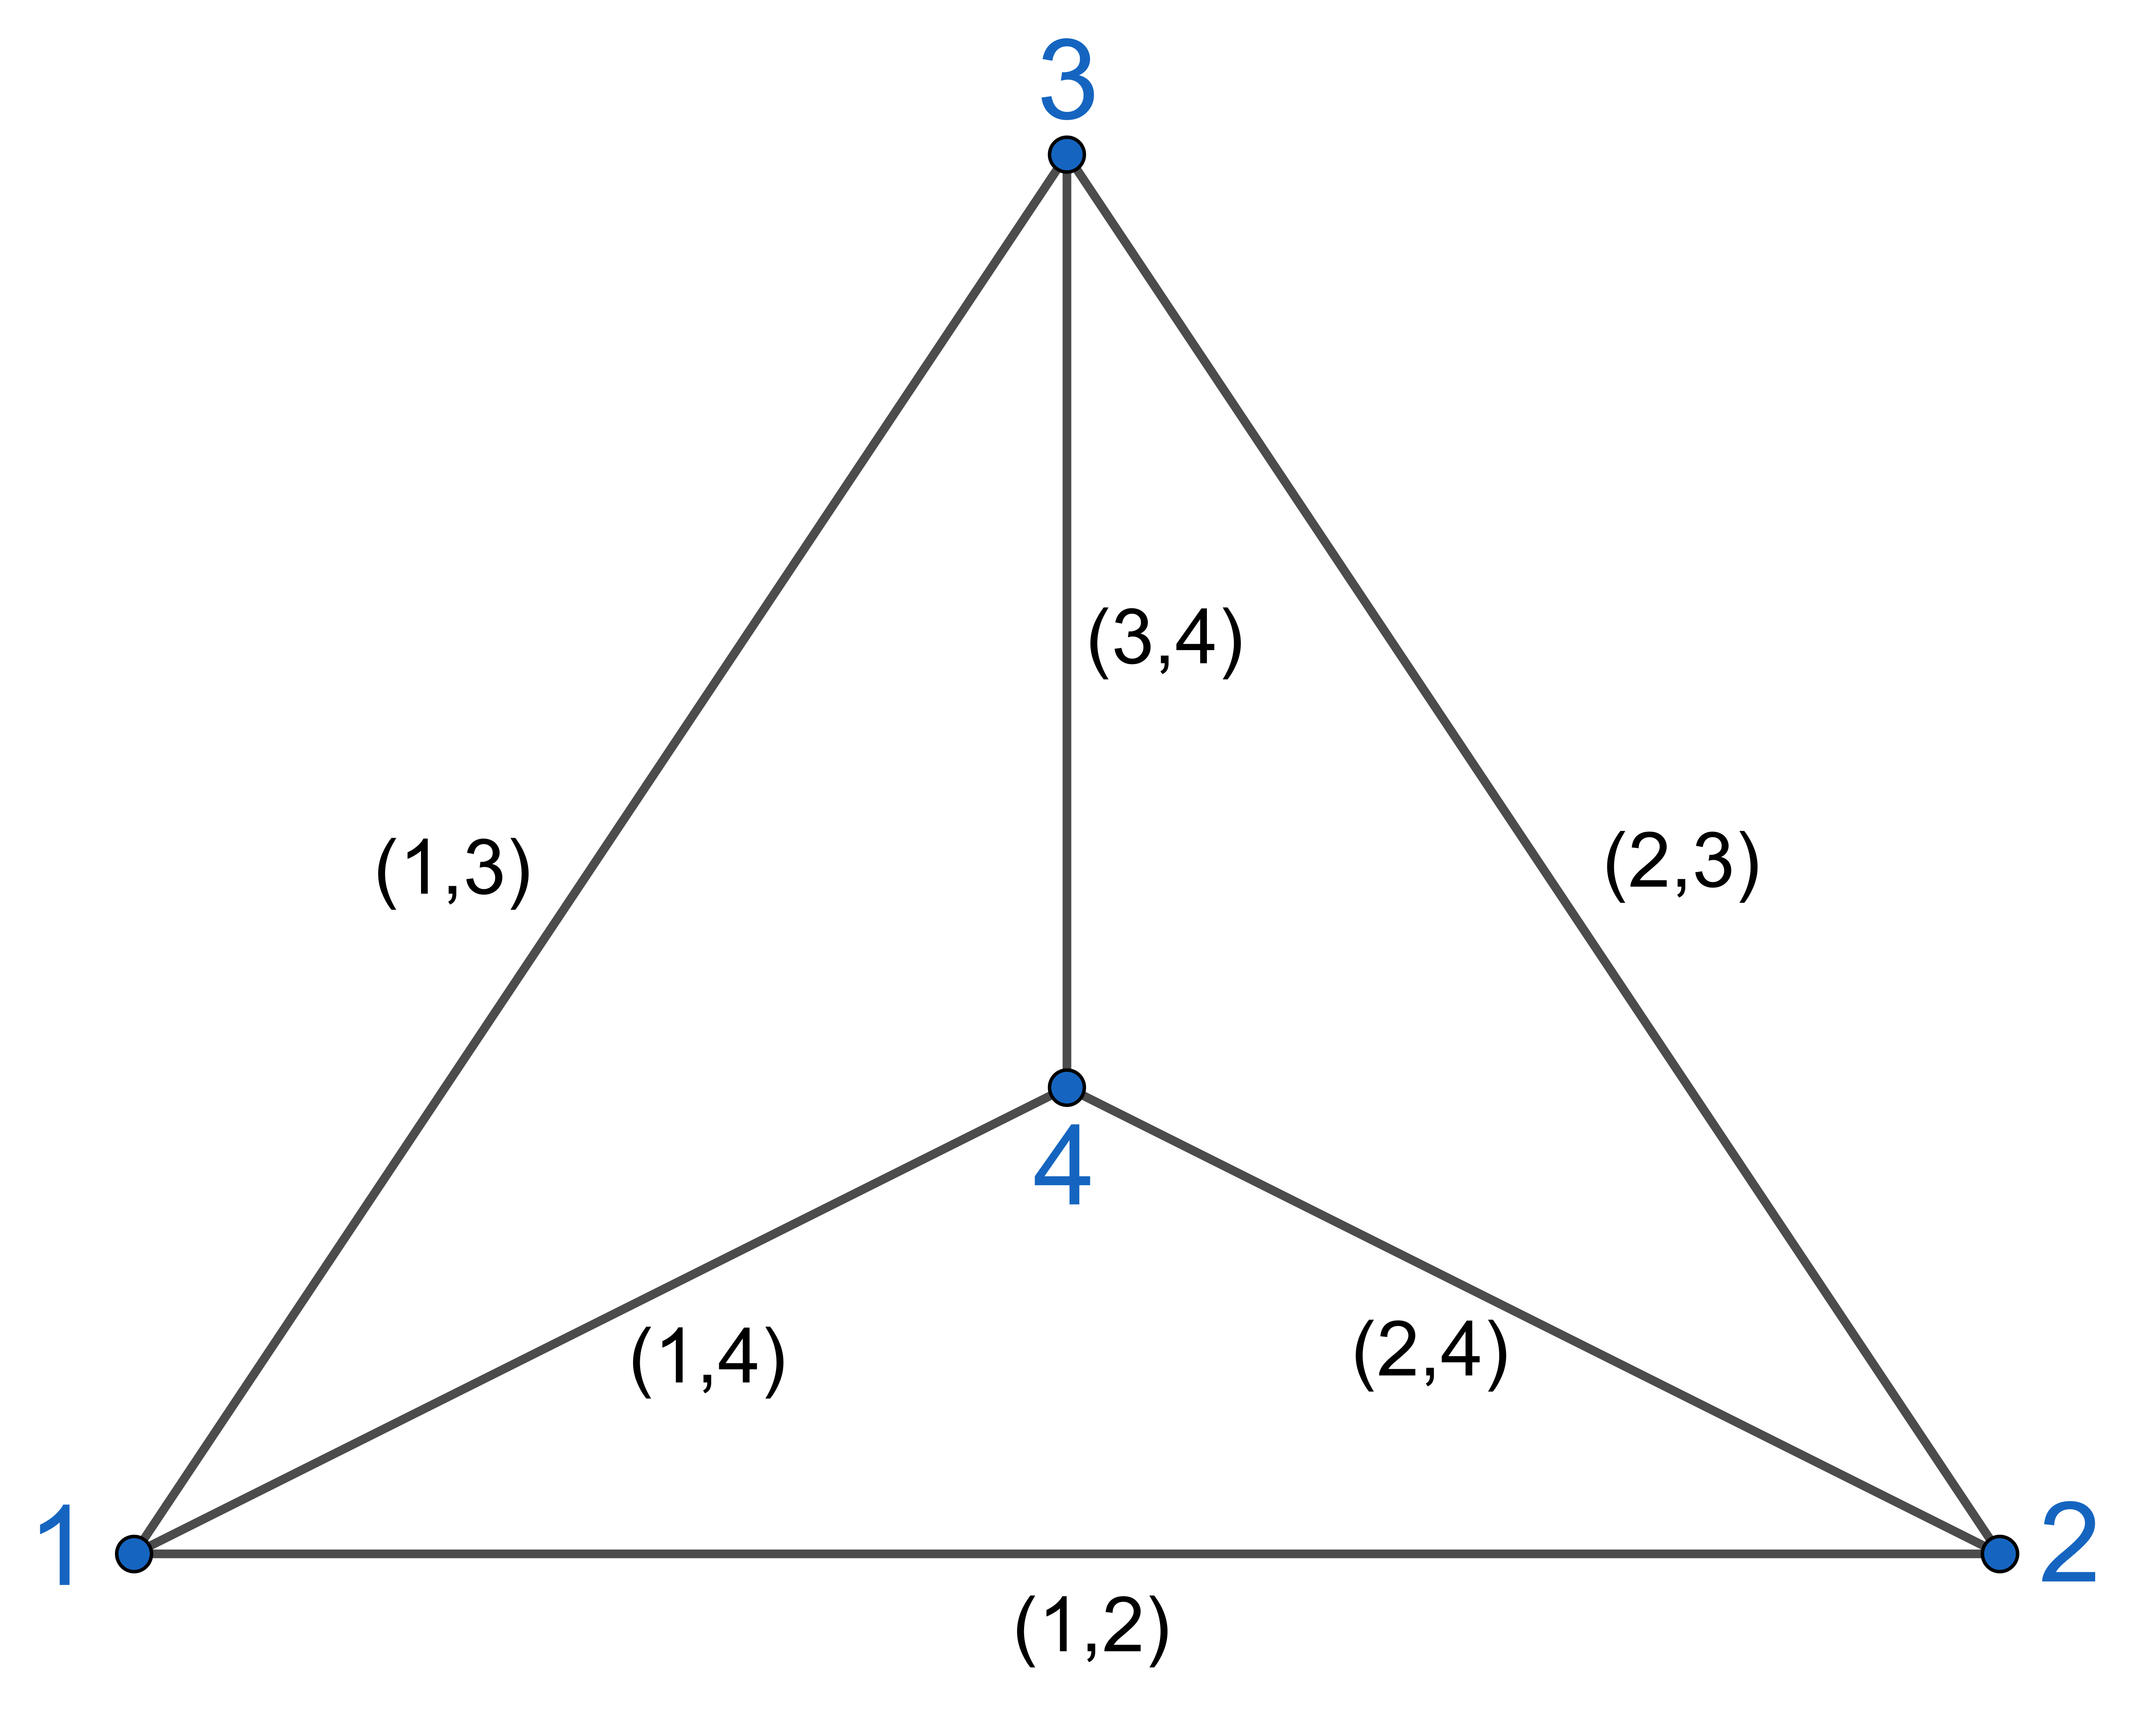
>>> faceSet = ifs.GeneralizedIndexedFaceSet([(1, 2, 4), (2, 3, 4)])
Our example is a triangulated square with vertices 1 2 3 4 in cyclic order.
Faces and edges will always appear as (lists respectively sets of) tuples by using
face_list().
>>> faceSet.get_vertex_set()
{1, 2, 3, 4}
>>> faceSet.face_list()
[(1, 2, 4), (2, 3, 4)]
>>> sorted(faceSet.edge_set())
[(1, 2), (1, 4), (2, 3), (2, 4), (3, 4)]
The edges get added to the edge_list by following the boundary of the faces in the input order while the boundary of a face are all tuples of edges with cyclic orientation.
>>> faceSet.face_boundary((1, 2, 4))
((1, 2), (2, 4), (4, 1))
Note that edges in the edge_list are sorted tuples and in the face_boundary they rather follow an orientation of the face.
We can simply add a face.
>>> faceSet.add_face((1, 3, 4))
>>> faceSet.face_list()
[(1, 2, 4), (2, 3, 4), (1, 3, 4)]
>>> faceSet.number_of_faces()
3
Neighbors and opposite faces can be accessed.
>>> faceSet.opposite_face((1, 3, 4), (4, 1))
(1, 2, 4)
>>> faceSet.adjacent_faces((1, 4))
[(1, 2, 4), (1, 3, 4)]
>>> faceSet.adjacent_faces((4, 1))
[(1, 2, 4), (1, 3, 4)]
As edge tuples are always sorted there is no orientation of the faces given.
The IFS Generator
The ifs_generator is a module for simple construction of common geometric
objects. The module contains functions for generating geometric data for objects such as combinatorics and
default coordinates.
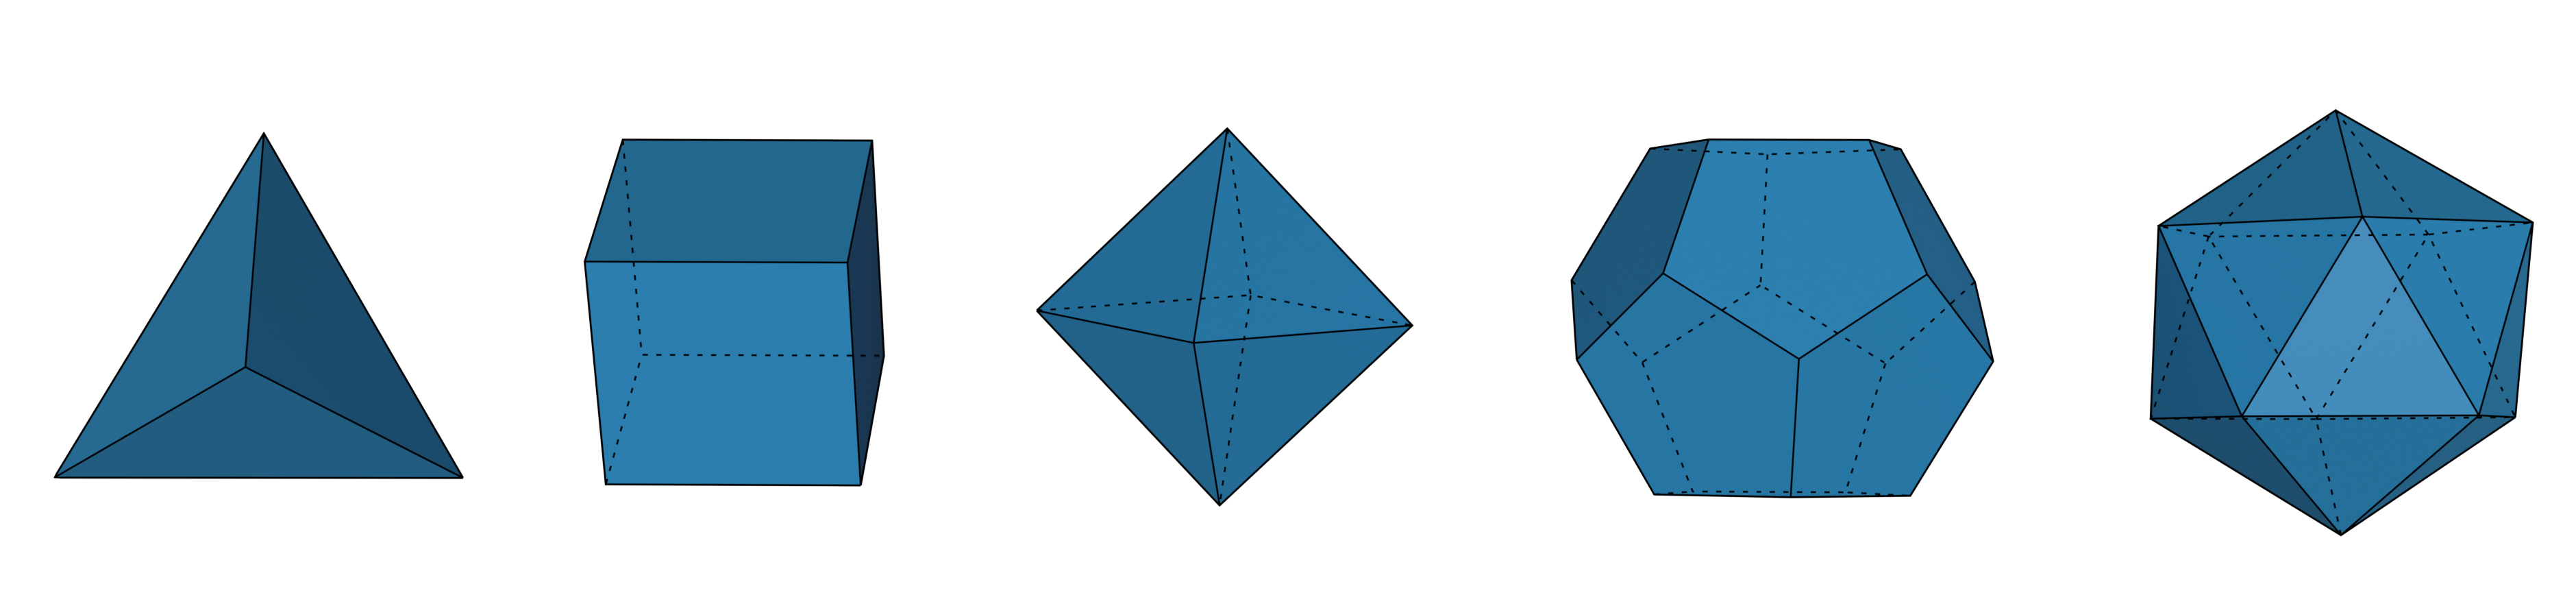
We can create platonic solids using:
>>> import numpy as np
>>> import ddg.datastructures.indexedfaceset.ifs_generator as gen

>>> tetrahedron = gen.tetrahedron()
>>> cube = gen.cube()
>>> octahedron = gen.octahedron()
>>> dodecahedron = gen.dodecahedron()
>>> icosahedron = gen.icosahedron()
You can change the name of the vertex coordinates through with
co_attr. If you wish to not set the coordinates, you can
use co_attr=None.
>>> cube = gen.cube(co_attr=None)
One can also create a cylinder()
>>> import ddg.datastructures.indexedfaceset.ifs_generator as gen
>>> cylinder = gen.cylinder(
...     resolution=20,
...     fill_caps=True,
...     top_radius=1,
...     bot_radius=1,
...     length=1,
...     center=(0, 0, 0),
...     normal=(0, 0, 1),
...     co_attr="co",
... )
an arrow()
>>> import ddg.datastructures.indexedfaceset.ifs_generator as gen
>>> arrow = gen.arrow(
...     resolution=20,
...     heights=(0, 0.7, 0.7, 1),
...     radii=(0.05, 0.05, 0.125),
...     co_attr="co",
... )
or a disc()
>>> import ddg.datastructures.indexedfaceset.ifs_generator as gen
>>> disc = gen.disc(
...     resolution=20, center=(0, 0, 0), normal=(0, 0, 1), radius=1, co_attr="co"
... )
A cone can be created in two ways. The first is to use cone()
which will create a cone that has n + 1 vertices, where n is the given resolution. This means that there is only
one vertex at the tip of the cone.
>>> import ddg.datastructures.indexedfaceset.ifs_generator as gen
>>> cone = gen.cone(
...     resolution=20,
...     fill_caps=True,
...     radius=1,
...     length=1,
...     center=(0, 0, 0),
...     normal=(0, 0, 1),
...     co_attr="co",
... )
The other way is to use cylinder() and set one radius to zero.
This will create a cone with 2 * n vertices, meaning that the tip of the cone has actually n vertices instead
of just one. This is useful if you want to be able to change the radius of the tip (e.g. if you want to animate the
radius).
>>> import ddg.datastructures.indexedfaceset.ifs_generator as gen
>>> cone = gen.cylinder(resolution=20, top_radius=0, bot_radius=1)
Note that for cylinder() and
cone() you can choose to exclude the faces of the
circles (fill_caps=False and fill_caps=False).
All of the objects above use methods from the geometric_objects module,
which provides functions to create faces and coordinates of geometric objects.
Apart from the basic geometric shapes, the ifs_generator also
contains the functionality to create both quad and triangle grids.
To create a 2D quad grid, one can use
>>> import ddg.datastructures.indexedfaceset.ifs_generator as gen
>>> quad_grid = gen.grid((2, 3), co_attr="co")
>>> quad_grid.vertex_attributes["co"]
array([[0, 0],
       [1, 0],
       [0, 1],
       [1, 1],
       [0, 2],
       [1, 2]])
Note that the default coordinates are also 2D in this case. If you wish create a 2D grid in 3D space, then you can
use the shape (m, n, 1)
>>> import ddg.datastructures.indexedfaceset.ifs_generator as gen
>>> quad_grid = gen.grid((2, 3, 1), co_attr="co")
>>> quad_grid.vertex_attributes["co"]
array([[0, 0, 0],
       [1, 0, 0],
       [0, 1, 0],
       [1, 1, 0],
       [0, 2, 0],
       [1, 2, 0]])
The method also accepts 3D input shapes (m, n, k)
>>> import ddg.datastructures.indexedfaceset.ifs_generator as gen
>>> quad_grid = gen.grid((2, 3, 2), co_attr="co")
>>> quad_grid.vertex_attributes["co"]
array([[0, 0, 0],
       [1, 0, 0],
       [0, 1, 0],
       [1, 1, 0],
       [0, 2, 0],
       [1, 2, 0],
       [0, 0, 1],
       [1, 0, 1],
       [0, 1, 1],
       [1, 1, 1],
       [0, 2, 1],
       [1, 2, 1]])
which will create a 3D quad grid.
If a triangle grid is needed, then one can call
>>> import ddg.datastructures.indexedfaceset.ifs_generator as gen
>>> triangle_grid = gen.triangle_grid((2, 3), co_attr="co")
>>> triangle_grid.vertex_attributes["co"]
array([[0, 0],
       [1, 0],
       [0, 1],
       [1, 1],
       [0, 2],
       [1, 2]])
which, if default coordinates are used, creates the same grid as grid except that the faces
are triangulated. Just as with grid, one can also choose to create 3D coordinates with (m, n, 1)
>>> import ddg.datastructures.indexedfaceset.ifs_generator as gen
>>> triangle_grid = gen.triangle_grid((2, 3, 1), co_attr="co")
>>> triangle_grid.vertex_attributes["co"]
array([[0, 0, 0],
       [1, 0, 0],
       [0, 1, 0],
       [1, 1, 0],
       [0, 2, 0],
       [1, 2, 0]])
It also supports 3D triangle grids
>>> import ddg.datastructures.indexedfaceset.ifs_generator as gen
>>> triangle_grid = gen.triangle_grid((2, 3, 2), co_attr="co")
>>> triangle_grid.vertex_attributes["co"]
array([[0, 0, 0],
       [1, 0, 0],
       [0, 1, 0],
       [1, 1, 0],
       [0, 2, 0],
       [1, 2, 0],
       [0, 0, 1],
       [1, 0, 1],
       [0, 1, 1],
       [1, 1, 1],
       [0, 2, 1],
       [1, 2, 1]])
Both grid and triangle_grid use the grids module
which contains methods to create quad and triangle grids.
Attributes
Setting attributes to cells
The attributes assigned to each cell are stored as instance attributes general_vertex_attributes, general_edge_attributes and general_face_attributes.
The attributes can be assigned to cell using the method set_attribute() which has the name of the attribute together with the cell type and the values of the attributes to be assigned as parameters:
>>> from ddg.datastructures.indexedfaceset.ifs import (
...     GeneralizedIndexedFaceSet as ifs,
... )
>>> faceSet = ifs([(1, 2, 4), (2, 3, 4, 5), (1, 4, 7)])
>>> vertex_attr = [[0, 0, 0], [0, 0, 1], [0, 1, 0], [0, 1, 1], [1, 0, 0], [1, 0, 1]]
>>> faceSet.set_attribute("coord", "verts", vertex_attr)
>>> faceSet.general_vertex_attributes
{'coord': {1: [0, 0, 0], 2: [0, 0, 1], 3: [0, 1, 0], 4: [0, 1, 1], 5: [1, 0, 0], 7: [1, 0, 1]}}
Different attributes will be stored as different keys to the dictionary:
>>> height_attribute = [10, 20, 30, 40, 50, 60]
>>> faceSet.set_attribute("height", "verts", height_attribute)
>>> faceSet.general_vertex_attributes
{'coord': {1: [0, 0, 0], 2: [0, 0, 1], 3: [0, 1, 0], 4: [0, 1, 1], 5: [1, 0, 0], 7: [1, 0, 1]}, 'height': {1: 10, 2: 20, 3: 30, 4: 40, 5: 50, 7: 60}}
The attributes can be also assigned only to a subset of the cells by specifyiing the optional parameter in set_attribute():
>>> vertex_subset = {1, 2, 4}
>>> attribute_subset = [[1, 1, 1], [1, 1, 2], [1, 1, 4]]
Here two cases arise. First case would be when the attribute to be assigned to the subset does not already exist:
>>> faceSet.set_attribute("new_attr", "verts", attribute_subset, vertex_subset)
>>> faceSet.general_vertex_attributes
{'coord': {1: [0, 0, 0], 2: [0, 0, 1], 3: [0, 1, 0], 4: [0, 1, 1], 5: [1, 0, 0], 7: [1, 0, 1]}, 'height': {1: 10, 2: 20, 3: 30, 4: 40, 5: 50, 7: 60}, 'new_attr': {1: [1, 1, 1], 2: [1, 1, 2], 4: [1, 1, 4]}}
Or the case when the attributes already exists. In this case the attributes is updated at the specified cells:
>>> faceSet.set_attribute("coord", "verts", attribute_subset, vertex_subset)
>>> faceSet.general_vertex_attributes
{'coord': {1: [1, 1, 1], 2: [1, 1, 2], 3: [0, 1, 0], 4: [1, 1, 4], 5: [1, 0, 0], 7: [1, 0, 1]}, 'height': {1: 10, 2: 20, 3: 30, 4: 40, 5: 50, 7: 60}, 'new_attr': {1: [1, 1, 1], 2: [1, 1, 2], 4: [1, 1, 4]}}
This feature is similar for edges and faces.
>>> area_attributes = [[100], [150], [200]]
>>> faceSet.set_attribute("area", "faces", area_attributes)
>>> faceSet.general_face_attributes
{'area': {(1, 2, 4): [100], (2, 3, 4, 5): [150], (1, 4, 7): [200]}}
In order to delete an attribute from the dictionary, the method delete_attribute() can be used:
>>> faceSet.delete_attribute("new_attr", "verts")
>>> faceSet.general_vertex_attributes
{'coord': {1: [1, 1, 1], 2: [1, 1, 2], 3: [0, 1, 0], 4: [1, 1, 4], 5: [1, 0, 0], 7: [1, 0, 1]}, 'height': {1: 10, 2: 20, 3: 30, 4: 40, 5: 50, 7: 60}}
Getting and Setting attributes
Getting and setting attributes for single cells can be done using methods get_attribute() and set_attribute(). Notice that here the cells themselves must be given and not their indices:
>>> faceSet.get_attribute("height", "verts", 7)
60
>>> faceSet.get_attribute("area", "faces", (1, 4, 7))
[200]
In IndexFaceSet objects, indices can also be given to the methods (see below).
Another important thing to notice is that the “set” method ignores any type or size missmatch between the new attribute for the cell and the attributes of other cells, therefore the user must be alert of the types and sizes:
>>> faceSet.set_attribute("area", "faces", {500, 200}, (1, 4, 7))
>>> faceSet.general_face_attributes
{'area': {(1, 2, 4): [100], (2, 3, 4, 5): [150], (1, 4, 7): {200, 500}}}
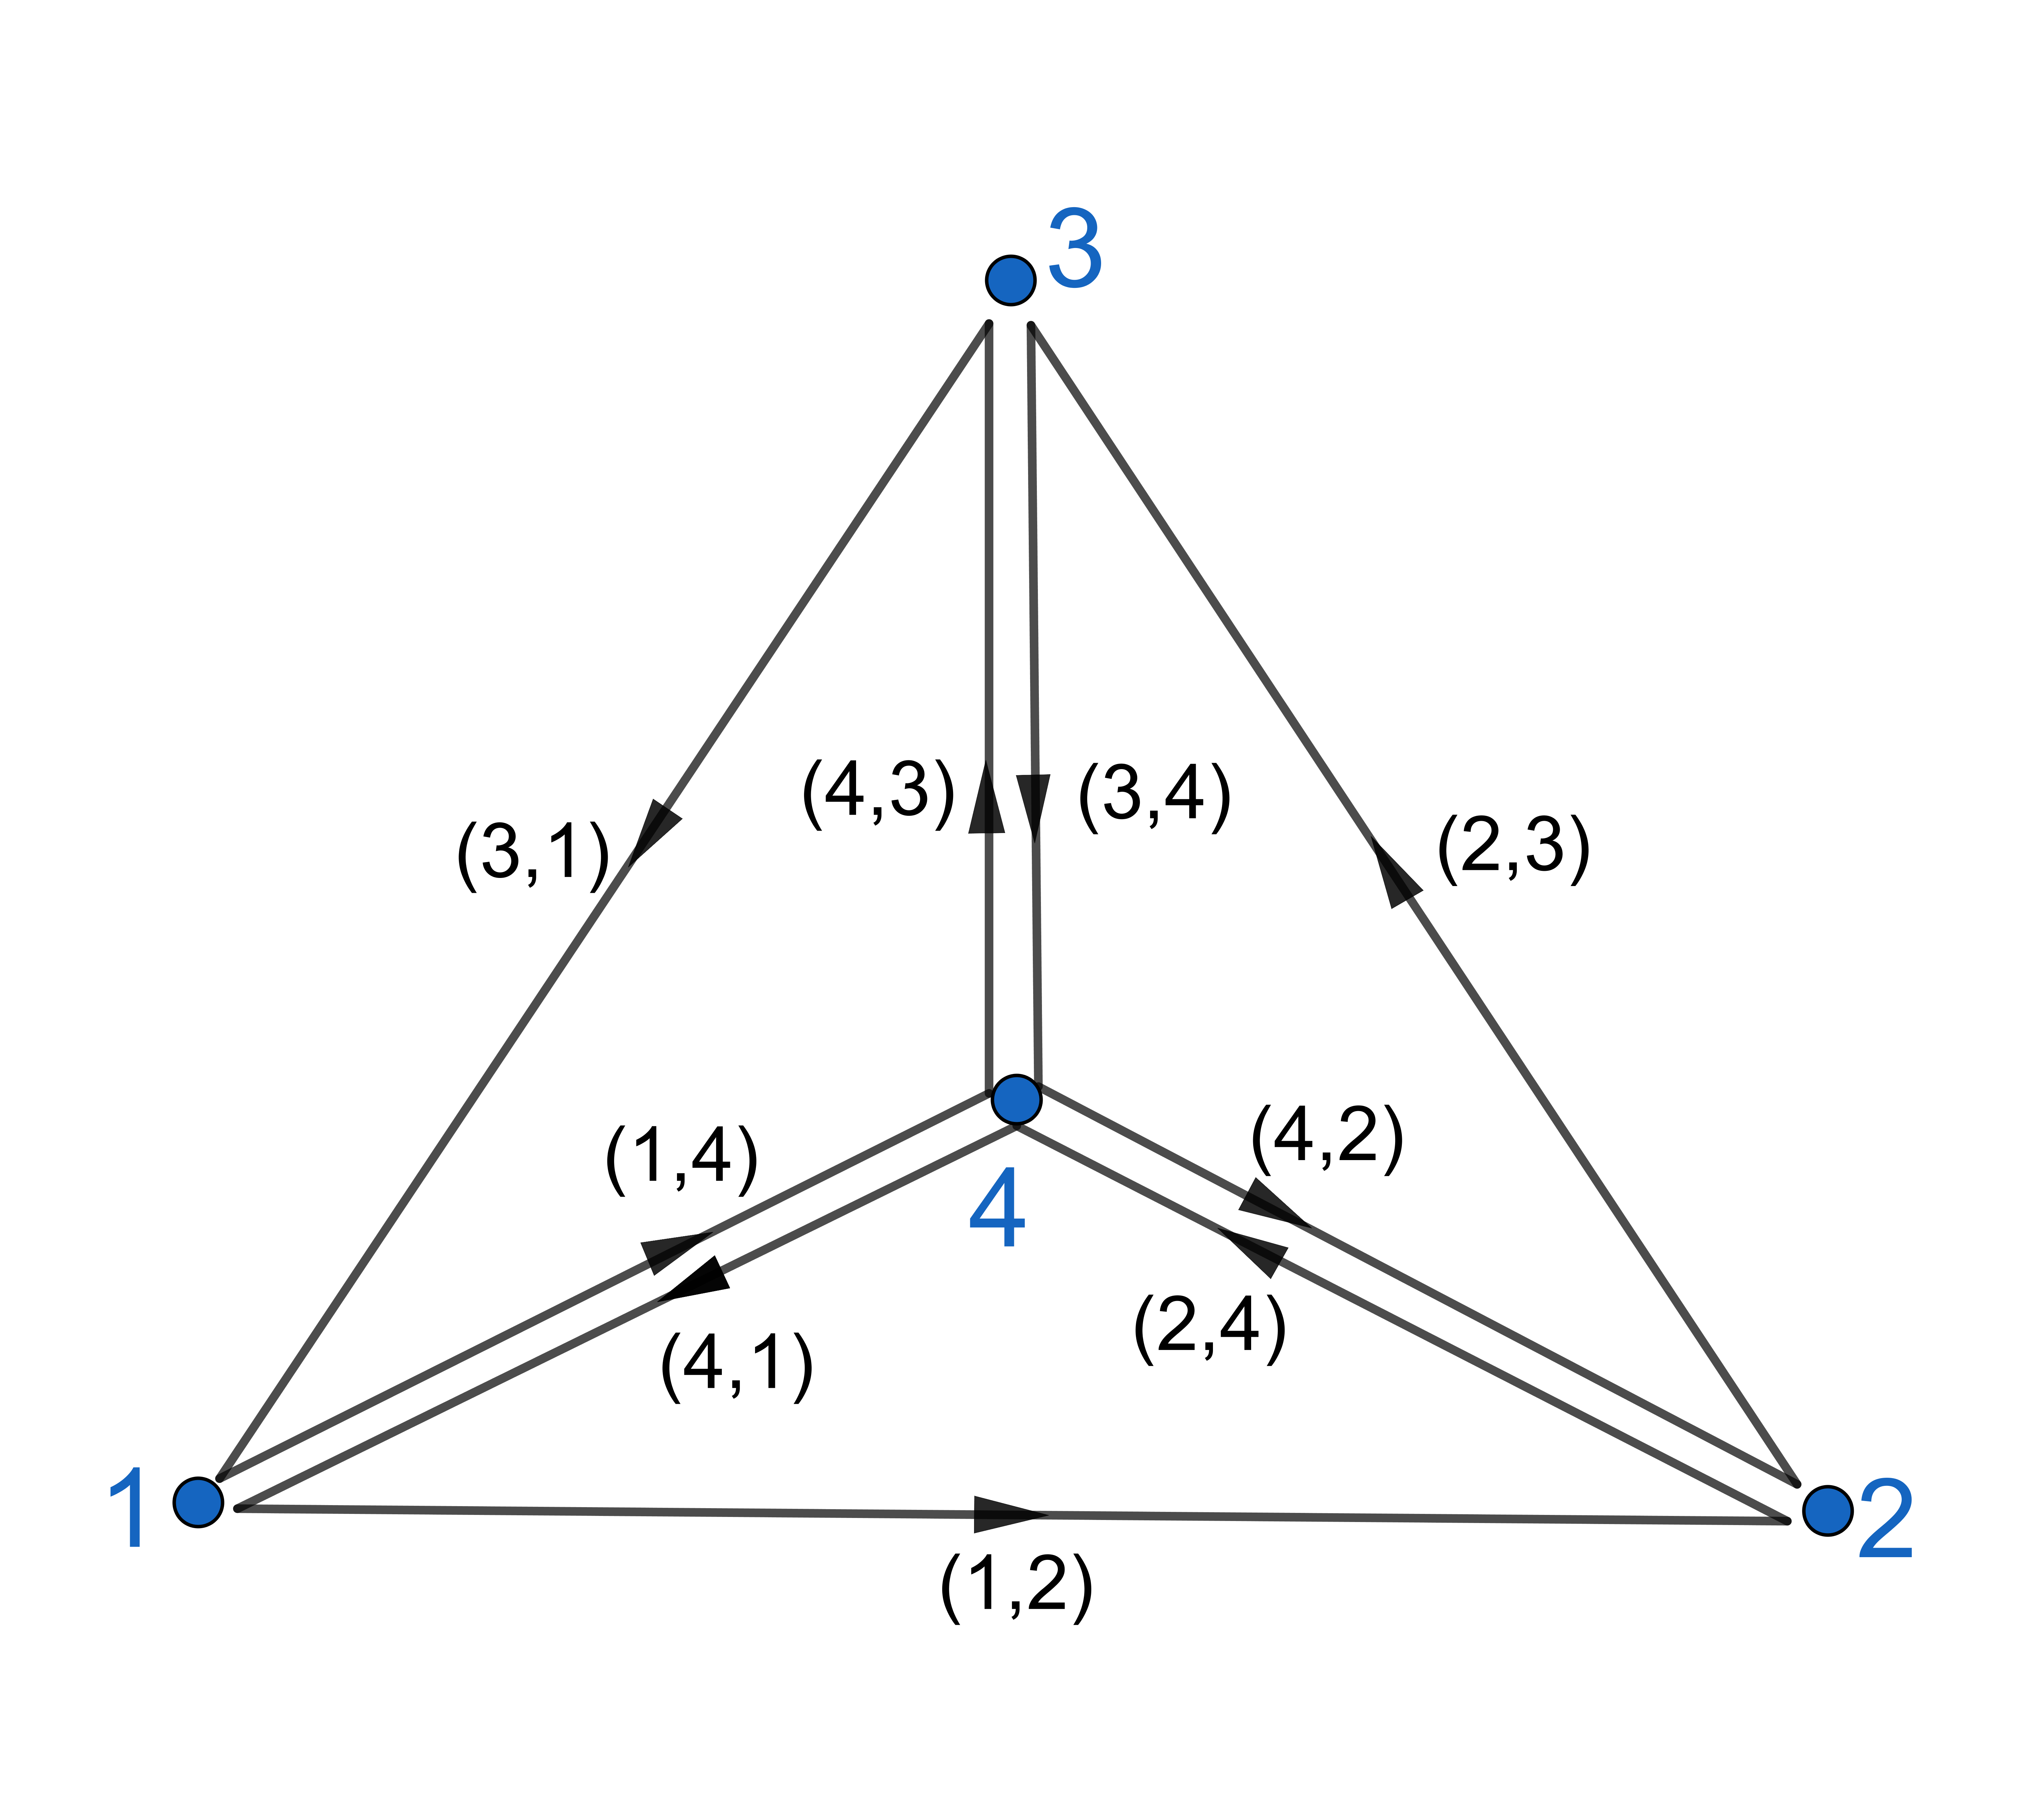
Oriented indexed face sets
We can initialize a faceSet that comes with an orientation for every faces according to the input order of vertices. Opposite edges (those edges that are adjacent to the same vertices but belong to different faces) will always have to direct into different directions. Therefore these edges are called “halfedges”.
>>> import ddg.datastructures.indexedfaceset.ifs as ifs
>>> faceSet = ifs.OrientedIndexedFaceSet([(1, 2, 4), (2, 3, 4), (1, 4, 3)])
By construction every edge uniquely determines its face. We can look for all adjacent faces of an edge which will always result in a list including one face.
>>> faceSet.adjacent_faces((2, 4))
[(1, 2, 4)]
>>> faceSet.adjacent_faces((4, 2))
[(2, 3, 4)]
The edge_list will look the same as in the non-oriented case i.e. including sorted tuples, for every two opposite halfedges one edge tuple.
We can not change the orientation of faces but we can view them as instances of the class “OrientedFace”. If, for example, we ask for OrientedFaces that are adjacent to a given edge, i.e. (2,4), we will get two faces but the face (2,3,4) with reversed orientation.
>>> faceSet.adjacent_faces_with_orientation((4, 2))
[<ddg.datastructures.indexedfaceset.ifs.OrientedFace object at 0x...>, <ddg.datastructures.indexedfaceset.ifs.OrientedFace object at 0x...>]

>>> [f.get_tuple() for f in faceSet.adjacent_faces_with_orientation((2, 4))]
[(1, 2, 4), (2, 3, 4)]
By calling the tuple itself we cannot draw conclusions on their orientation. Therefore the face tuple with the correct vertex order can be accessed by OrientedFace.get_oriented_tuple() and further the input orientation will be denoted by 1 and a reversed orientation by -1 when calling OrientedFace.get_orientation().
>>> [f.get_orientation() for f in faceSet.adjacent_faces_with_orientation((2, 4))]
[1, -1]
>>> [
...     f.get_oriented_tuple()
...     for f in faceSet.adjacent_faces_with_orientation((2, 4))
... ]
[(1, 2, 4), (4, 3, 2)]
As above we can ask for all neighboring faces of a faces while their orientation (1 or -1) will be determined by the orientation of the edges in the initial face.
>>> [
...     f.get_oriented_tuple()
...     for f in faceSet.neighboring_faces_with_orientation((1, 2, 4))
... ]
[None, (4, 3, 2), (3, 4, 1)]
opposite_face_with_orientation will work in the same way. As input it requires a face and a sorted edge tuple that has to fit to the orientation of the face. If it does so, it will return the face opposite to the given edge with its orientation determined by the input edge.
>>> faceSet.opposite_face_with_orientation((1, 2, 4), (2, 4)).get_oriented_tuple()
(4, 3, 2)
>>> faceSet.opposite_face_with_orientation((1, 2, 4), (4, 2))
Traceback (most recent call last):
...
ValueError: Edge is not an edge of the face
Converting indexed face sets
This section will deal with the automatic conversion from an indexed face set to an oriented indexed face set and from either one to a surface, i.e. a The half-edge data structure object. For these we need the utils module.
>>> import ddg.datastructures.indexedfaceset.ifs as ifs
>>> import ddg.datastructures.indexedfaceset.utils as utils
Firstly one can (this will be done implicitly in the following conversions and raise an Value Error if False) check if the given indexed face set is a manifold, namely if every undirected edge of the indexed face set is contained in at most two faces.
>>> faceSet = ifs.GeneralizedIndexedFaceSet([(1, 2, 4), (2, 3, 4), (1, 3, 4)])
>>> utils.is_manifold(faceSet)
True
Since oriented face sets require the manifold property by construction this will always hold for them but has to be checked for manually generated (non-oriented) indexed face sets.
For a non-oriented face set we can call utils.orient(IndexedFaceSet). This will, starting with the first face, do a breadth-first search to orient all further faces depending on the previous orientations. If possible it will return the oriented face set as an object of the class OrientedIndexedFaceSet and if not it will raise a Value Error.
>>> utils.orient(faceSet).face_list()
[(1, 2, 4), (2, 3, 4), (4, 3, 1)]
The class OrientedIndexedFaceSet includes same methods as in IndexedFaceSet except that the add_face function will also make sure that the given face does not conflicts with the manifold structure.
Finally we can convert the faceSet to a half edge data structure. It orients the faceSet and thus checks the manifold property. If the indexed face set can not be converted an empty half edge data structure is returned.
The function call is:
indexed_face_set_to_surface(ifs,
                            vertex_index_attribute='ifs_index',
                            face_index_attribute='ifs_face_index')
such that the vertices and faces have index attributes based on the indices in the faceSet which can be named.
>>> hds = utils.indexed_face_set_to_surface(faceSet)

>>> [f.ifs_face_index for f in hds.faces]
[0, 1, 2]
>>> [v.ifs_index for v in hds.verts]
[1, 2, 3, 4]
IndexedFaceSet
These are types of ifs that has enumerated vertices from 0 to n-1. They tend to work with numpy arrays anywhere possible. For example the edges are not stored as tuples but as 2D numpy arrays.
Similarly, if the faces are all same type of polygon, the faces are also stored as 2D numpy array.
The cells are stored in instance attributes verts, edges and faces to be comparable with their counterpart in halfedge surfaces.
>>> from ddg.datastructures.indexedfaceset.ifs import IndexedFaceSet as ifs
>>> faceSet = ifs([(1, 2, 3), (4, 0, 2), (1, 5, 3, 0)])
>>> faceSet2 = ifs([(1, 2, 3), (4, 0, 2), (1, 5, 3)])
>>> faceSet.verts
array([0, 1, 2, 3, 4, 5])
>>> faceSet.edges
array([[0, 1],
       [2, 4],
       [1, 2],
       [0, 4],
       [1, 5],
       [0, 3],
       [2, 3],
       [0, 2],
       [1, 3],
       [3, 5]])
>>> faceSet.faces
array([(1, 2, 3), (4, 0, 2), (1, 5, 3, 0)], dtype=object)
>>> faceSet2.faces
array([[1, 2, 3],
       [4, 0, 2],
       [1, 5, 3]], dtype=object)
Notice for IndexedFaceSet data type of face arrays are object and therefore the verices cannot be used as indices directly. The user must
change the dtype to any int to be able to use them as indices. This have been automatically resolve in NgonalIndexedFaceSet.
Setting attributes to cells
The same method as the general case can be used to set attributes to cell. This method however is the overriden method of the parent class:
unlike the parent class, we will not store the attributes as dictionaries with cells as keys. We will however store the whole numpy array in
a dictionary. Additionally, attributes are stored in vertex_attributes,
edge_attributes and face_attributes.
To clarify consider the following exmaple:
>>> vertex_attr = [[0, 0, 0], [0, 0, 1], [0, 1, 0], [0, 1, 1], [1, 0, 0], [1, 0, 1]]

>>> faceSet.set_attribute("coord", "verts", vertex_attr)
>>> faceSet.vertex_attributes
{'coord': array([[0., 0., 0.],
       [0., 0., 1.],
       [0., 1., 0.],
       [0., 1., 1.],
       [1., 0., 0.],
       [1., 0., 1.]])}
Notice how attributes as list are automatically converted to numpy arrays.
To delete an attribute is similar with the parent class:
>>> faceSet.delete_attribute("coord", "verts")
Adding attribute to faces and edges are also similar:
>>> face_attribute = [10, 20, 30]
>>> faceSet.set_attribute("area", "faces", face_attribute)
>>> faceSet.face_attributes
{'area': array([10., 20., 30.])}
Getting attributes relating to a single cell
In IndexedFaceSet, vertices and their indices coincide. Therefore for all cells, the possibility has been created to ask for the attribute of a cell using the cell itself or their indices:
>>> faceSet.set_attribute("coord", "verts", vertex_attr)
>>> faceSet.get_attribute("coord", "verts", 3)
array([0., 1., 1.])
>>> faceSet.get_attribute("area", "faces", 2)
30.0
>>> faceSet.get_attribute("area", "faces", (1, 5, 3, 0))
30.0
Grid
The Grid class allows to create either 2D or 3D grids as sublattices of \(\mathbb{Z}^2\) or \(\mathbb{Z}^3\).
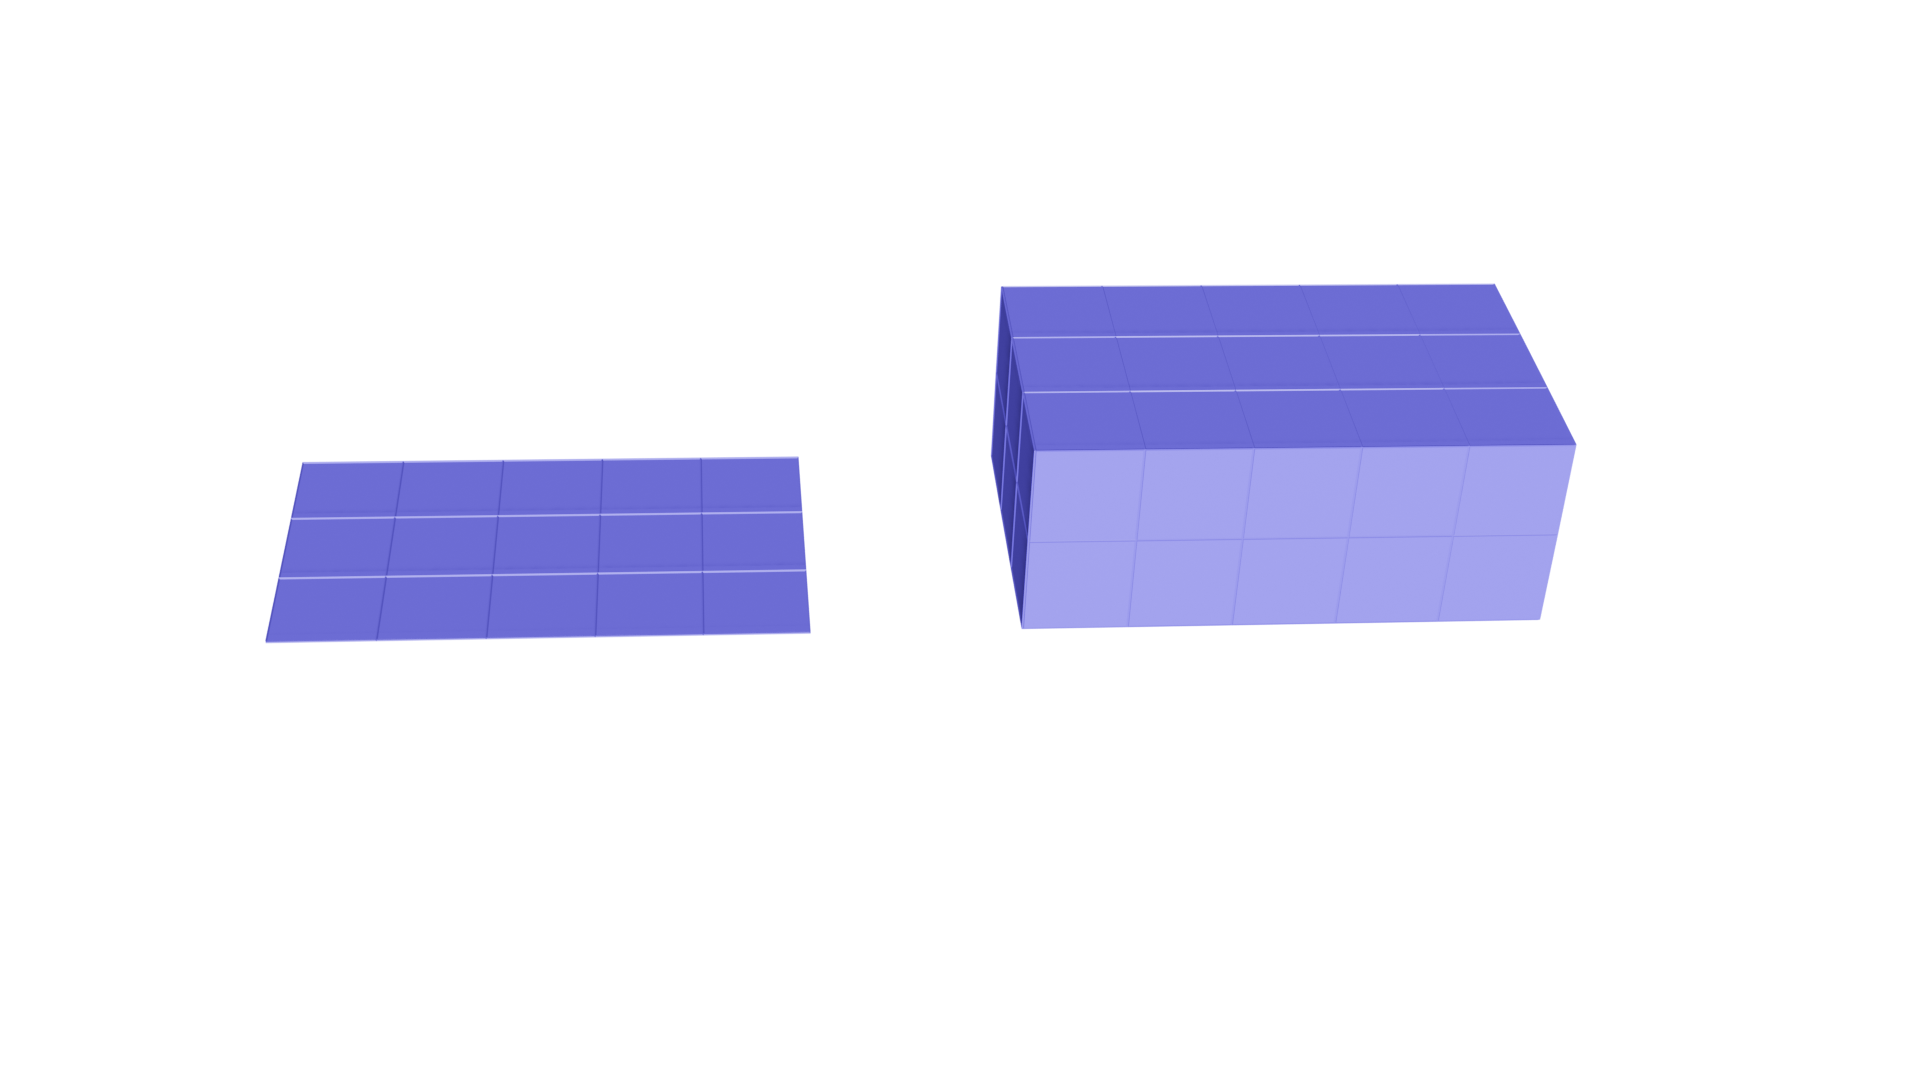
By specifying the periodicity different topologies can be achieved. Specifying the periodicity leaves the number of vertices unchanged, and results in additional faces. A raw grid without any concrete coordinate values for vertices can be created simply by passing the shape and the type of the topology. For the current possible options see the table below.
Periodicity |
Topology |
Periodic Direction |
|---|---|---|
(0, 0) |
Disk |
None |
(1, 0) |
Cylinder |
Along the first coordinate direction |
(0, 1) |
Cylinder |
Along the second coordinate direction |
(1, 1) |
Torus |
Along both directions |
(-1, 0) |
Moebius Band |
Along the first direction in reversed orientation |
(0, -1) |
Moebius Band |
Along the second direction in reversed orientation |
Grids with specific topology can be created as follows:
>>> from ddg.datastructures.indexedfaceset.ifs import Grid
>>> grid_shape = (4, 3)
>>> grid_periodicity = (0, 0)
>>> grid = Grid(grid_shape, grid_periodicity)
>>> grid.faces
array([[ 0,  1,  5,  4],
       [ 1,  2,  6,  5],
       [ 2,  3,  7,  6],
       [ 4,  5,  9,  8],
       [ 5,  6, 10,  9],
       [ 6,  7, 11, 10]])
>>> cylinder_periodicity = (1, 0)
>>> cylinder = Grid(grid_shape, cylinder_periodicity)
>>> cylinder.faces
array([[ 0,  1,  5,  4],
       [ 1,  2,  6,  5],
       [ 2,  3,  7,  6],
       [ 4,  5,  9,  8],
       [ 5,  6, 10,  9],
       [ 6,  7, 11, 10],
       [ 0,  3,  7,  4],
       [ 4,  7, 11,  8]])
The new faces from gluing side for a cylinder can be seen in the example.

The Grid class further accepts a boolean parameter in its constructor - default_coordinates - which allows to assign default
coordinate values to the vertices under the attribute name “co”:
>>> new_grid = Grid(grid_shape, grid_periodicity, True)
>>> new_grid.vertex_attributes
{'co': array([[0., 0., 0.],
       [1., 0., 0.],
       [2., 0., 0.],
       [3., 0., 0.],
       [0., 1., 0.],
       [1., 1., 0.],
       [2., 1., 0.],
       [3., 1., 0.],
       [0., 2., 0.],
       [1., 2., 0.],
       [2., 2., 0.],
       [3., 2., 0.]])}
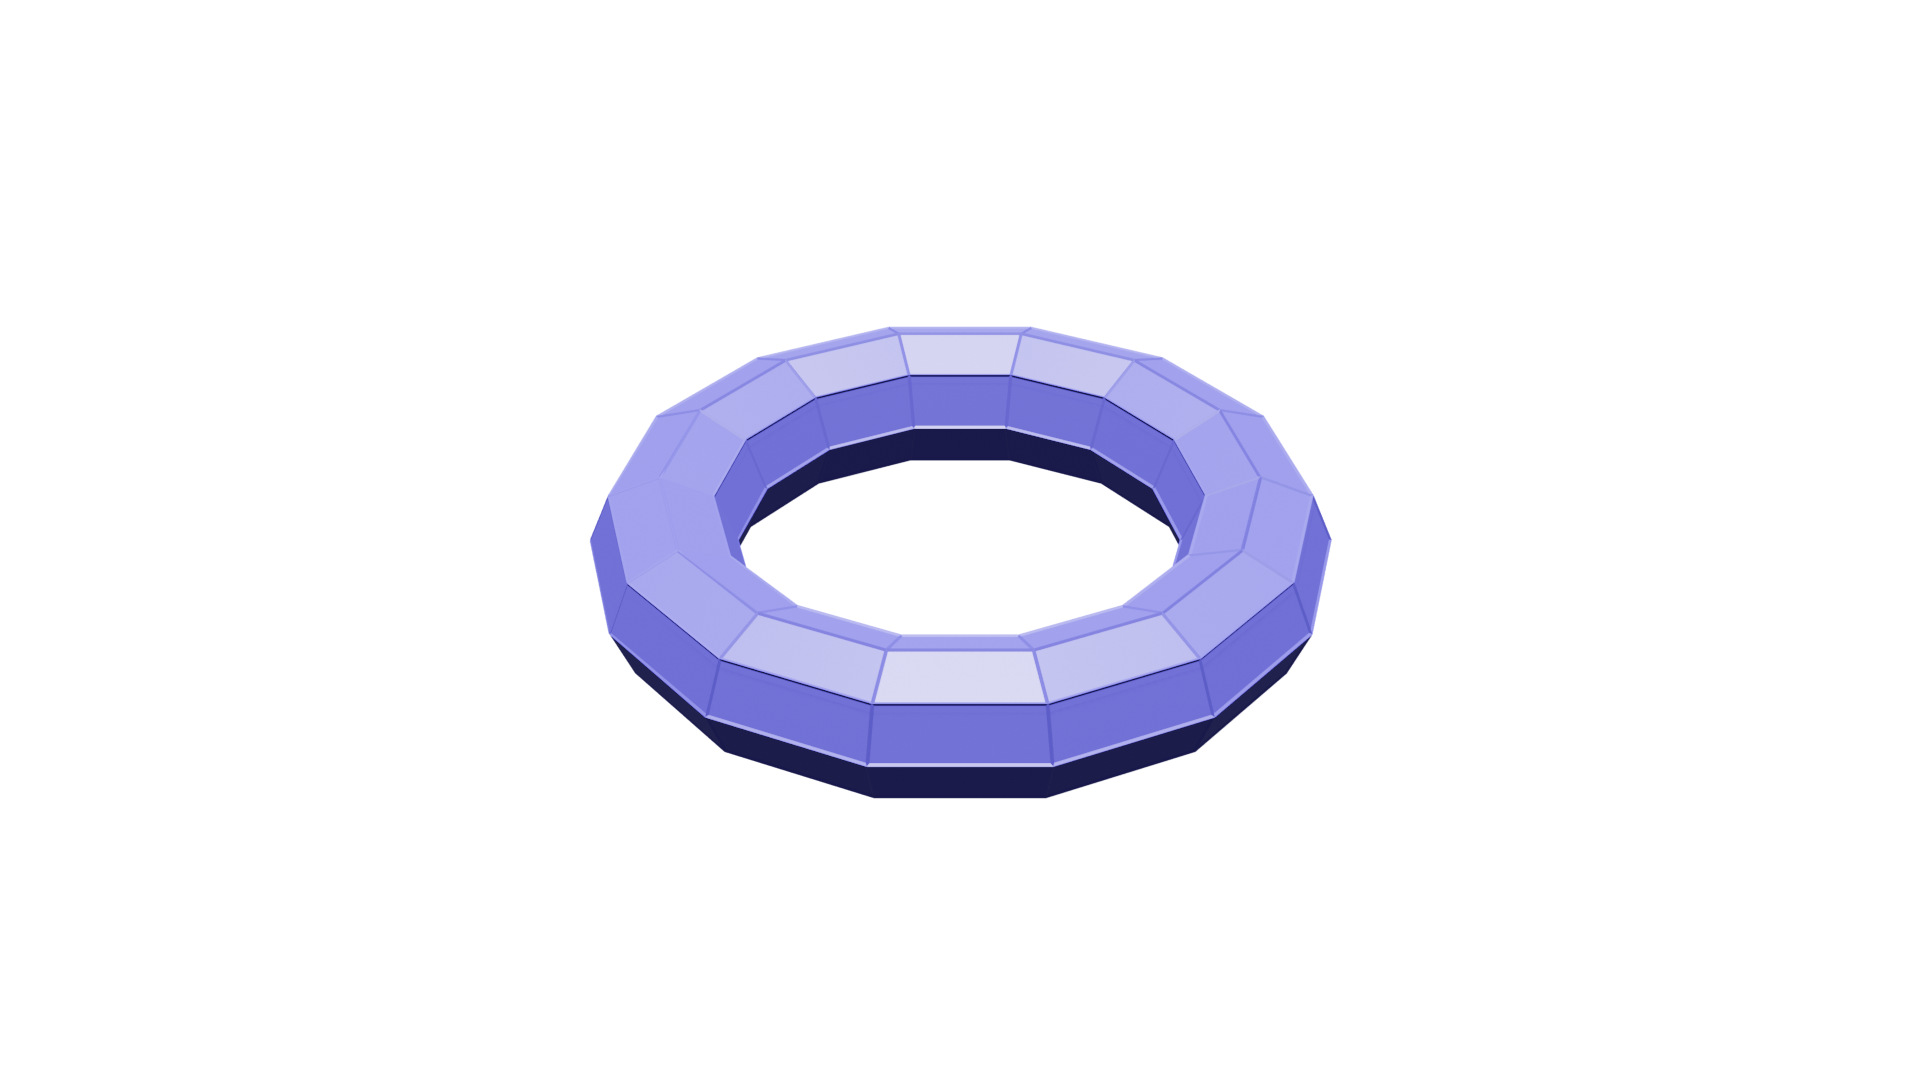
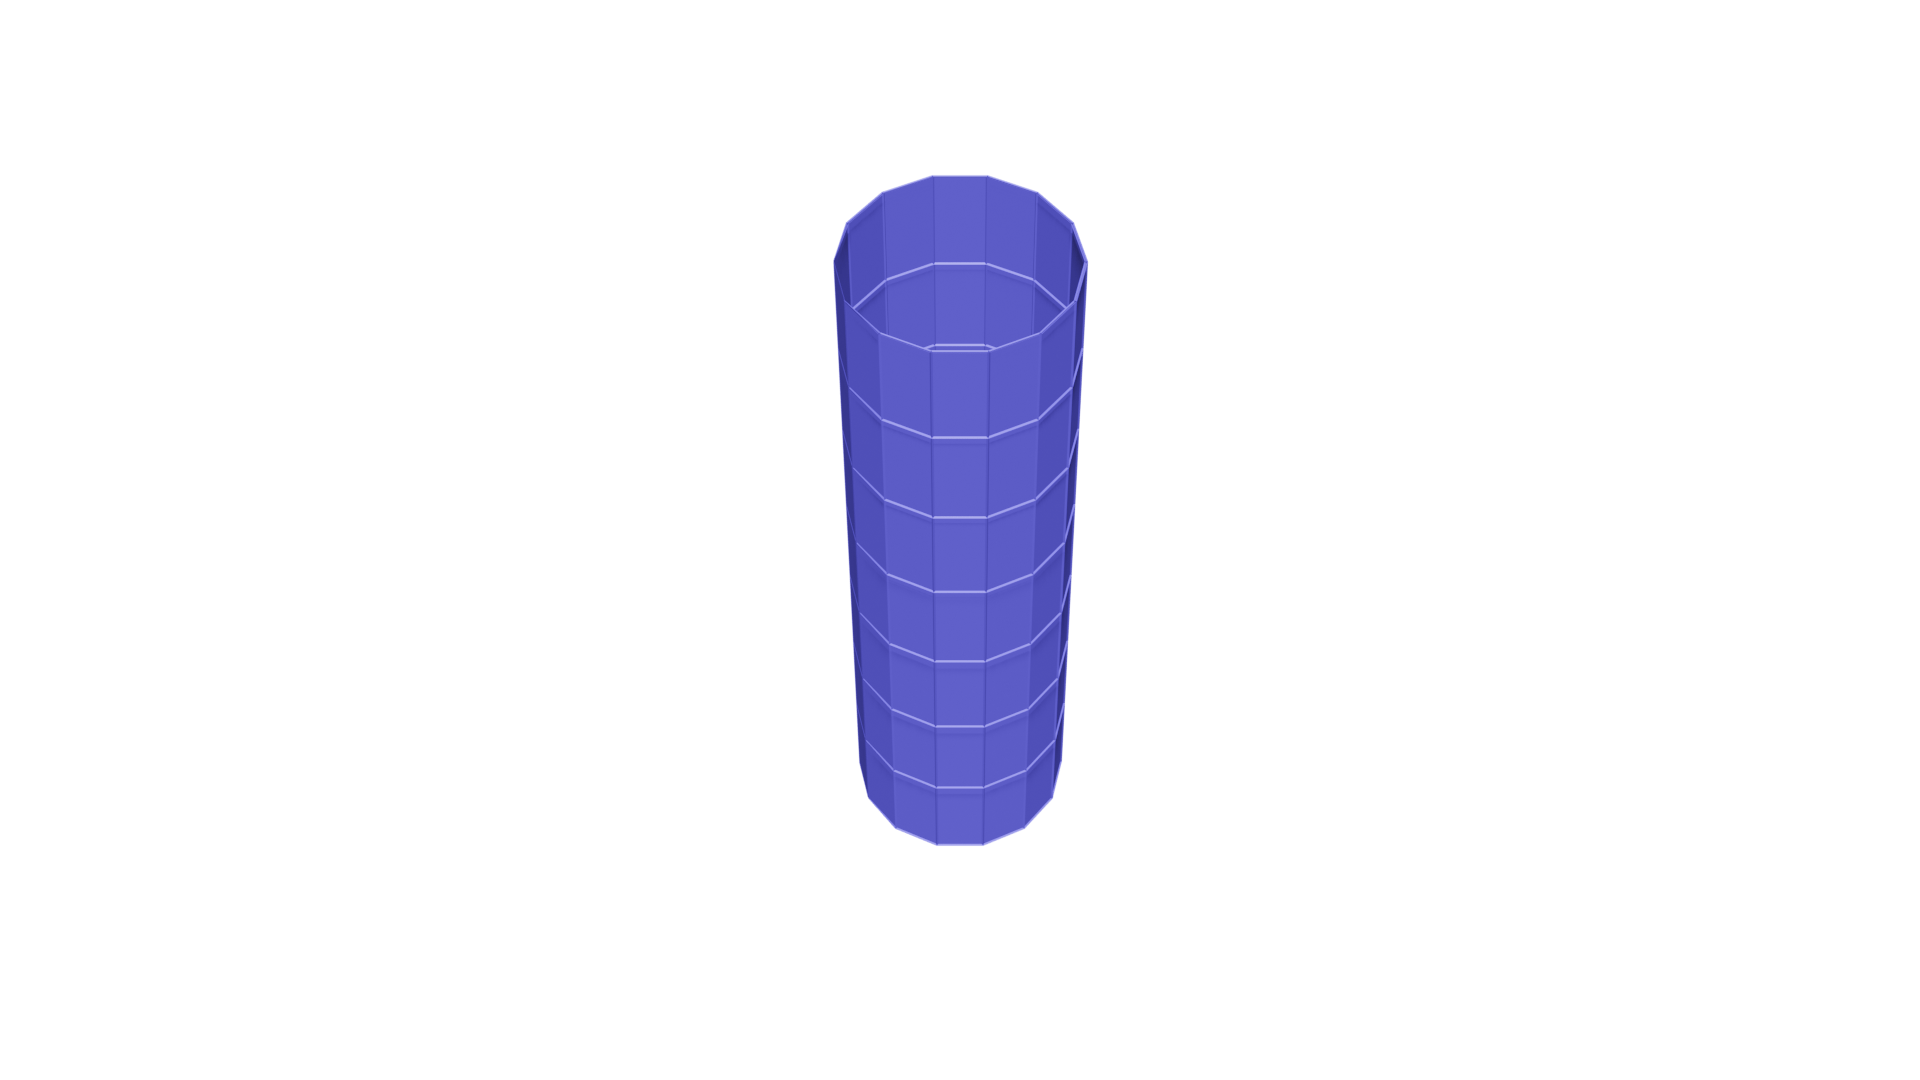
Using the default coordinates, one can visualize the objects of the Grid class.
Some examples of the grid of different periodicities can be seen in the following images:
>>> grid_shape = (14, 8)
>>> cylinder_periodicity = (1, 0)
>>> cylinder = Grid(grid_shape, cylinder_periodicity)
>>> moebius_periodicity = (-1, 0)
>>> moebius = Grid(grid_shape, moebius_periodicity)

>>> torus_periodicity = (1, 1)
>>> torus = Grid(grid_shape, torus_periodicity)